Configuring Watermark Settings on Encoding
In VIDIZMO, you can apply customizable watermarks to your content to include or embed it with meaningful information. You can optionally configure watermark settings to automatically apply custom watermarks to your content during transcoding. These watermarks are applied according to the default watermark templates selected for images, videos and documents in the control panel. Configuring the watermarking settings during transcoding with default watermark templates ensures consistency in the information embedded on the images, videos and documents you upload to the Portal.
Note: Watermarking on transcoding only works when VIDIZMO is configured as your Encoding provider.
To learn about watermarking in VIDIZMO, see Understanding Watermarking in VIDIMO
Prerequisites
- Ensure you belong to a group that has Portal Management and Watermark features enabled. See Enable Features in the VIDIZMO Portal for more information.
Enabling Watermarking for Uploads
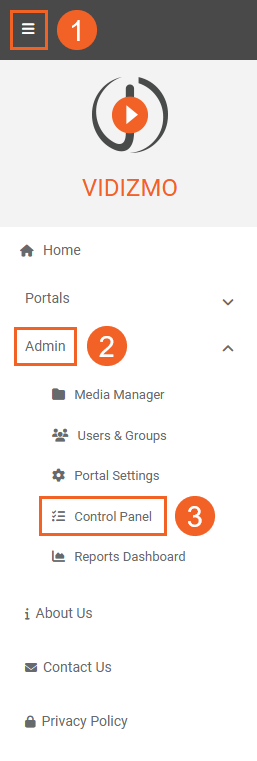
- Open the side navigation pane via the button on the top left.
- Click the Admin dropdown.
- Select Control Panel.

-
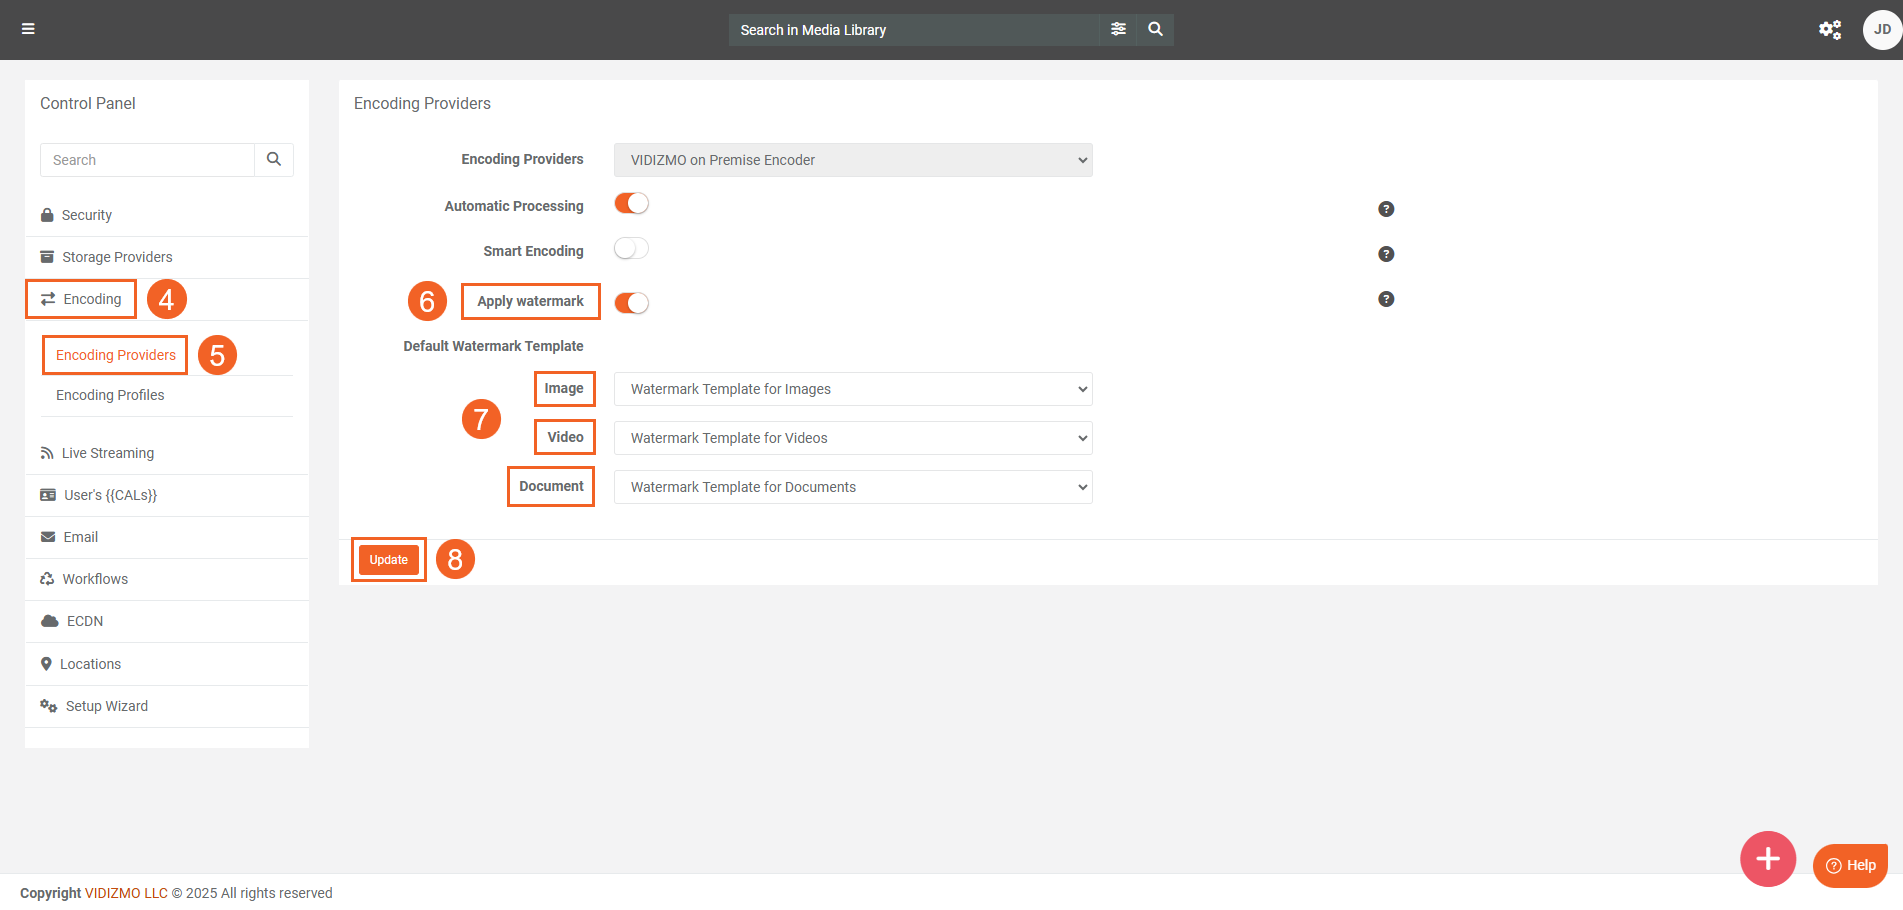
While in your Portal’s Control Panel, click Encoding.
-
Select Encoding Providers.
-
In the encoding provider section, enable watermarking functionality on your portal by turning the toggle on.
-
After turning the toggle on, select the default watermark template that will be used to apply the watermark during encoding. The watermark templates in the dropdown are here will be shown accordingly to content types. Select a default template for the following:
- Images
- Videos
- Documents
-
Click the Update button to save your settings.

For a guide on you can apply watermarks on your VIDIZMO content, refer to How to Add a Watermark to your Content.